EXPLAINING BLEED
Printed pieces require a specific setup in order to ensure no elements are lost during the cutting process. This setup consists of a Safety Margin, a Bleed, and the final Cut Line.
Safety Margin: Any type or critical elements should be positioned at least 3/16 inch inside of the Cut Line.
Bleed: Any background image or color that extends to the edge of the piece should further extend 1/8 inch past the Cut Line.
Cut Line: This line indicates the final size of the printed piece. It is only for design purposes and should not appear on the artwork sent for printing, neither should the Bleed or Safety Margin lines.
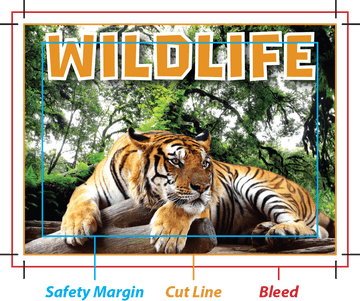
Below is an illustration of the correct and incorrect way to set up a file for print.
Good File
Bleed: Artwork is extended to the bleed line on all sides.
Safety Margin: The type is located completely inside the safety margin.
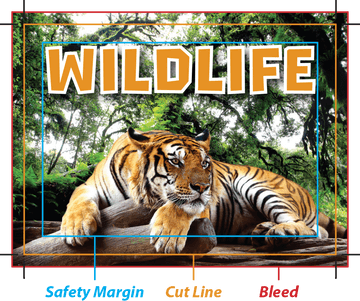
Bad File
Bleed: The artwork does not extend to the bleed line.
Safety Margin: Part of the type is outside of the safety margin, putting it in danger of being trimmed off during cutting.